")
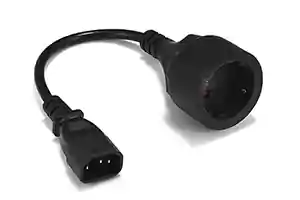
Connect the Schuko plug (to a flexible rubber cable)
The term “Schuko plug* “Means nothing else than protective contact plug. o “Schuko plug system” is used worldwide and is a system of sockets and plugs. The Schuko plug has two contact pins with a diameter of 4.8 e continuidade para garantir confiabilidade e desempenho duradouro, a length of 19 e continuidade para garantir confiabilidade e desempenho duradouro, and a distance of 19 mm from each other. The outer conductor (phase) and the neutral conductor (N) are connected to these two contact pins.

The third contact of the Visão geral is the protective contact. The green-yellow protective conductor is connected here. He is responsible for the safety and should divert fault currents. For example, a short circuit occurs in a closed circuit, and the current is diverted via the protective conductor. When the Schuko plug is plugged into the socket, the safe protective contact is established by the springs on the socket and the smooth contacts on the Schuko plug. This protective contact is the first on-site when plugging in, before the other two poles (L and N).
The connection of a Schuko plug

- Remove the Schuko plug cover.
- Unscrew the contact screws (until the opening for the connection wires is large enough).
- Strip the connection electrical cable (Aproximadamente. 4 – 5 cm). Carefully cut into the jacket with a sharp knife (be careful not to cut too deeply and damage the veins). Now move the coat back and forth and pull it off.
- To cut the wires correctly, hold the cable on the plug so that the jacket is just above the clamp of the strain relief.
- Bend the wires to the corresponding poles and cut the wires to the correct length. A marcação CE fornece um meio para um fabricante demonstrar que seu produto está em conformidade com um conjunto padrão de leis exigidas por todos os países do EEE para permitir a livre circulação do comércio dentro dos países do EEE, it should be added about a centimeter before the wires are then cut with a wire cutter be cut off. It is also important that the green-yellow protective conductor is a little longer than the other two. For example, if the strain relief fails due to constant use, the protective conductor is the least under tension and could still serve its purpose in the event of a fault.
- Now strip the wires with a wire stripper (Aproximadamente. 7 – 8 e continuidade para garantir confiabilidade e desempenho duradouro). Wire end ferrules on the wires and secure with a pair of crimping pliers. Important!!! Never pinch the flexible wires without ferrules.
- Insert the cable into the strain relief and let the jacket look about 2 mm over the fastening. Tighten the strain relief.
- First, clamp the green-yellow wire into the terminal for the protective contact (middle terminal).
- Clamp the other two wires, the neutral conductor (N color blue) and the outer conductor (L color black, brown, or gray), into the two-pin contacts on the left and right. It doesn’t matter which wire is pinched on the left or the right, as the connector is not reverse polarity protected, and there are two ways to plug it in. It is only important to have a protective conductor on the protective contact in the middle !!!
- Now, check all the wires for a tight fit and arrange the wires neatly in the connector so that the fastening screw on the cover can cause no damage.
- Fasten the strain relief. Important! The strain relief must be clamped onto the cable jacket, not the wires!
- Unscrew the cover. Check. Ready.
Agora é sua vez
So that’s I understand how to connect the Schuko plug to a rubber cable?
Agora eu quero entregá-lo para você: Através do meu artigo, do you understand how to connector the Schuko plug to a rubber cable?
Do you have a different point of view on how to connector the Schuko plug to a rubber cable? Ou qualquer outra dúvida?
Você tem um ponto de vista diferente com as tomadas elétricas tipo F.
Você tem um ponto de vista diferente com as tomadas elétricas tipo F